Monday, February 25, 2013

WIP Update

With only 3 days left to this month I wanted to share the only thing I've finished so far.  Blame busy-ness,  long loved visitors, temperamental sewing machine determined to break, for the delay.

When I posted the WIP for the chevron rag quilt, I only had this sketched diagram of what I thought I wanted.


I found out pretty soon that what was in my head did not transfer easily to the cloth.

My intention was to only rag the chevron stripes and leave the rest of the fabric smooth.  I cut out all the triangles, squares and rectangles I needed. and sewed them down the middle.


 Sewed triangles wrong sides together.


Sewed the triangulated squares together.  So far so good...


  But then I thought about the point


What would I do with the point when I sewed the rows together?  I could cut it off but that would compromise the look of the chevron stripe.  Then I thought about how the whole thing would look since now the front and the back of the quilt would have ragged edges.  That would not work!  That would be way too much cutting!  How could a baby lay on such a bumpy quilt?  It definitely needed a smooth side.  So I turned to a quilt I made over 2 years ago:


This is how I should make the quilt this time.
I deconstructed what I had started and re-sewed everything, putting wrong sides together the usual way.


Here is the result of the Chevron Stripe Baby Rag Quilt

Front

Back


I am pleased to say the Mother-to-be was happy.


Sunday, February 17, 2013

WIP for FEB.

I saw this blog, Never too Hot to Stitch, and I wanted to join in to be more accountable for getting my projects done.  Here are my works in progress for February:

I'm working on a baby blue bordered t-shirt quilt for a teacher's son


I finished just the top of this t-shirt quilt


I'm working on a little lap quilt of the scrabble board just for fun.


And I have to make a baby rag for a shower on Sunday.  I'm thinking I want to try a chevron pattern.


My goal will be to post the finished quilts before or by February 28.

Friday, February 15, 2013

Sewing Room Clean Up Along - Before Pics

I was reading through my favorite blog posts last night and I found the challenge by Sewingbymoonight  to clean up my "explosive creativity".  How did she know my sewing room looked like an explosion of creativity?  Actually, I love that description over my own : "horrible mess."  I always like to "tidy up" the room after each quilt or project is finished but I'm coming off two rag quilts, one in progress and two t-shirt quilts in progress so this challenge could not have come at a better time.


So here are my Before pictures of my sewing room (my favorite room in the house).


When you first walk in and look to the left you see finished quilts that should go into a closed bin to keep them dust and cat/dog hair free.  You also see WIP's and stacks of unorganized cut fabrics.


Next stop, my very cool Ikea shelf that was supposed to hold and organize all my flannels, fleeces, hankies, etc.  I should have gotten the bigger one...


My window on the world featuring the cat perch, aka my ironing board.  (Last night I was ironing and I walked away for just a moment.  My cat, Andy, jumped onto the ironing board and tipped the hot iron onto the faux wood blinds.  I now have a lovely melted hole in one of the slats...)


  The sewing factory where all the projects are made.  There's a box under the table which holds the scraps I might use for tea wallets.  There's a T-shirt quilt in progress.  There is a bin of denim for the back pocket wallets I make with my son.  My way too small pin up board for my  diagrams and inspirations. And my almost unuseable cutting mat.  (I usually cut my fabric at the kitchen table.)

So there is my "Before" tour.  I so hope I can post beautiful "After" pictures.  Thanks for the motivation Sewingbymoonlight !

Saturday, February 9, 2013

Quilt scraps

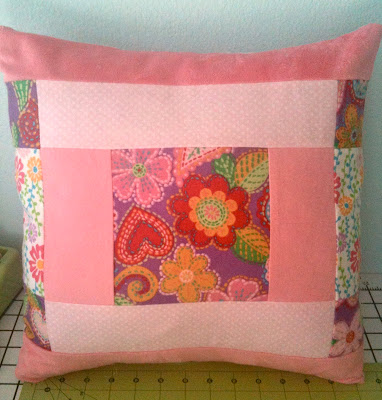
When you make quilts, you make scraps. I have been trying to come up with some good things to make out of the scraps.  Here's some of the things I have made with my scraps.

 quilts

stroller quilts


 burp cloths


 Doggy rag quilts


 pillows


and especially tea wallets


Please share what you've done with your quilt scraps.


Tuesday, February 5, 2013

The Most Challenging Rag Quilt

I have loved the challenges people present to me with their rag quilt ideas.  I've done a baby clothes rag quilt, a baby receiving blanket rag quilt adding hand painted kid prints to the back, a Charlie Brown rag quilt, a quilt made from a panel of fabric where I had to keep the pattern intact and a rag quilt with a stripe running through the perimeter.  However, the most challenging, (frustrating), rewarding rag quilt I've made was one for a friend who works at the Methodist church.

She asked if I could make a rag quilt with the Methodist cross and flame symbol on it and without thinking I said "of course."


I took a few days to just think about how I would do this. 
I started actually working on the quilt in July.
I knew I wanted to make it a lap size 5 squares by 5 squares.  I knew that white would be the color surrounding the cross and flame.  My friend picked out the fabrics she wanted, the most important being the cross and flame fabric.


She also wanted a black polka dot border around the entire quilt to frame the cross and flame.


I started constructing the cross and flame by sketching it out on a little square of paper.


Then on a roll of thin brown wrapping paper.   I cut the drawing into 9" squares, my usual size for rag quilt squares. The thin paper proved to be too flimsy a choice for using as a pattern so I transferred these drawings to heavy grocery bag brown paper.  A great way to reuse those bags.


(I saved those pattern pieces for a long time but a recently tossed them when I considered making another one of these quilts).

  Some of the things I tried didn't really work for one reason of another. The red fabric of the flame in some parts was too thin and delicate to simply sew down.  I used a double sided fusible material and fused the smaller pieces onto the white background then sewed around them. I had wanted the cross and flame to actually be ragged but found that was not working so a made it more of a fray edge.  The cross at one point was looking too big as well. 


And where the cross crossed the flame just didn't look right.
I took the whole thing apart twice and started all over.


I would put the quilt away and bring it back out and just stare at it trying to figure a better way to do it.  I mostly didn't want to break up the flame and cross but finally I realized that was the only way it would work as a true rag quilt.

I resorted to praying about it for divine inspiration because I knew my friend would be keeping it in her church office.   I decided to break up the picture which gave the quilt a window pane look.  I was very happy with the  way the quilt was turning out now and I believe my hands were being guided.   Thank God!


I wanted to stop at this point but it was not my quilt so I added the final black fabric with multi-colored polka dots and in December I finally gave my friend her quilt.


The most challenging rag quilt I've ever made.

Saturday, February 2, 2013

The Hard Parts of Making a Baby Memory Rag Quilt

I had done a number of t-shirt quilts and a whole bunch of rag quilts and at the time I felt like I knew exactly what I was doing making a rag quilt.  So when a teacher friend, who knew about my rag quilts, asked me to make her a quilt from all of her sons baby clothes I was scared to death that I would damage, harm, and completely mess up these treasured items.  I asked her if she would allow me to make the clothes into a rag quilt.  She said yes!  I thought it would be a snap but it turned out to be so much harder than I expected.

I started by cutting up the tiny, sweet smelling baby things which was heart wrenching actually. I kept thinking "what if I mess up..."  Then having to throw away the little scrap pieces I was not going to use.  Ohhh So hard! But I kept going.

Another hard part was deciding which part of the adorable clothes I was going to use.   I ended up cut and pasting some of the cutest designs.  I cut one tiny baseball shirt apart and made two squares out of it with the little tiny buttons still on.  I sewed a border of a coordinating blue cotton around each little cloth, cut squares of a coordinating blue flannel, 2 per square and sewed the squares together as I would a regular rag quilt.

I was very happy with the result after I had clipped all the seams but I had fallen in love with this little blue baby boy quilt. The absolute hardest part of all was giving it to my friend.